the easiest way to create a personal website (Bear)
bonus 1: add an ".is" domain, as in "johnsmith.is/awesome", bonus 2: tell your friends what you're up to with a /now page
The perfect platform for a simple personal website *does* exist: Bear ʕ•ᴥ•ʔ. It’s quick, it’s painless, frankly it’s fun—and yes, it’s also free. (Have you ever tried creating a personal website? I have, many times—and every single time, it sucked.)
Combine with a custom “.is” domain and you’re unstoppable! Imagine the possibilities—“your name” dot is, slash… “hot”, “brilliant”, “creative”. Your dreams of an ideal self can be realized—all you needed this whole time was the right domain name.
And what if you could have a digital home with a sign on the front door saying “this is what I’m up to nowadays”? That’s the beautiful idea of a now page—not as ephemeral as a tweet, nor as abstract as an About page—a window into what’s going on in your life and what projects are currently taking your attention. Think big-picture stuff—“what you’d tell a friend you hadn’t seen in a year”.
You can have all this very easily, perhaps even ten minutes from now. The old promise of the Internet—personal, delightful, comprehensible—can be fulfilled still. Just follow along, and pull out your wallet if you want to use a custom domain.
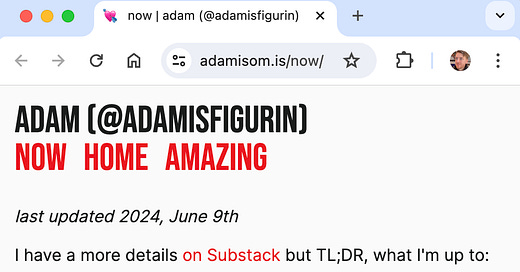
This is what my website looks like by the way. This is my “Now” page (as of… now):
The rest of this post will guide you through creating your own version of adamisom.is.
Basic steps
Sign up for bear blog → Add a /now page → Connect your domain name
bear blog!
go to https://bearblog.dev/, click ‘Sign up’, pick a title (like your name), pick your subdomain, and paste this into the field for your homepage text: “See what I’m up to [now](/now)”, and sign up!add pages!
sign in, go to dashboard, click your blog, click Pages then New Page. type “now” after “title:” (no spaces!) what you add is personal (example), I just suggest you start with “last updated _”.custom domain!
click Settings, then Custom Domain. then, log in to your domain registrar, and figure out how to create those DNS records. if you want a “.is”, I have more detailed instructions below!
Connecting a “.is” domain
Go to https://www.isnic.is/en, sign up, and register a domain! (Yes, it’s a bit annoying that you have to provide your address, but I think all registrars do that.) Now you can do <yourname>.is/reading-100-books, or /the-best-aunt, or /treasonous, or whatever!
By the way: back in my day, when I first registered <myname>.is, ISNIC’s website was only in Icelandic, and I had to use a (then-inferior) Google Translate to navigate it.
Now, back in Bear, toggle the “CNAME records aren’t available at my registrar”. You’ll add the two DNS records I’ve underlined below.
Back in ISNIC, find your new domain, find “DNS records” and click “Edit”. Then just add exactly the two records above. When you’re done it’ll look like this:
If you’re nervous, here follow more explicit instructions: Ignore the first dropdown. Select “CNAME” in the second dropdown (“Type”). Put “www” into the “Host” field (which corresponds to Bear’s “Name” field above). Copy “domain-proxy.bearblog.dev” into the “IPv4 address” field (which corresponds to Bear’s “Content” field above). Make sure TTL says 3600. Click the “+ Add” button. Then, just do similarly for the “A” record.
That’s all there is to it! Go to your website and you’ll see it, like magic! If you were too quick, then wait like one minute and go check again.
Optional: remove upvotes from your website pages
Have you noticed that your now-page has an upvote button and count at the bottom? It’ll be the same for other Pages you create. And hey, if you like that feature of Bear, great: it could be interesting to wait and see how many people randomly, unprompted, click that upvote button. But, if you’re like me and your preference for a clean page is stronger, you can hide it. (Oh, and maybe you don’t like the “Powered by Bear” thing—I do like it, but if you don’t, you might be able to come up with similar CSS to hide it.)
Go to your blog, click Themes, scroll to the bottom of the CSS, and paste this:
.upvote-count {
  display: none;
}
.css-i6dzq1 {
  display: none;
}
And now you’ve also accidentally learned that Bear has a bunch of Themes you can choose from. (I currently use “The Bold Type”.)
Enjoy!
You should poke around all of Bear’s features, because it is a refreshingly simple interface.
It is a little funny that I’m using it for static pages, not blog posts, but why not?
I’ll just plug my own new website one more time: adamisom.is. I have twelve pages already!—albeit most are pretty bare—head over to /amazing to see a list of ‘em all.


